How to setup Minikube (small Kubernetes development and testing environment) on OSX behind corporate proxy?
![]()
Introduction
So what is Minikube? Well it’s a tool that makes it easy to run Kubernetes locally (on your laptop, desktop machine or single server). How it works? Minikube runs a single-node Kubernetes cluster inside a VM on your machine. It’s is great tool to experiment and learn Kubernetes. In steps below I will cover how to setup Minikube on your Mac (OSX) in corportate environment (Yes - behind corporate proxy).
Setup
Before continuing with further steps - make sure you have brew installed on your Mac. If you don’t have brew package manager installed, follow link to get it installed on your machine first: https://brew.sh/
Next export proxy and install required packages: cntlm, virtualbox and minikube:
export htt{p,ps}_proxy=http://your-corporate-proxy.com:80
brew install cntlm
brew cask install virtualbox
brew cask install minikube
Now we will configure cntlm proxy - this will be running on our machine and will forward authentificated traffic to corporate proxy. First we need to encrypt hash of our user creds in order to use these inside cntlm (we don’t want to use password in clear text).
cntlm -H -u username -d example.com
Similar output will be shown - make sure to copy what has been generated on your screen (below output just as example):
Password:
PassLM          2357C2F00A5CAC77ACFF9FD541DE786K
PassNT          Z375790BDE3300DEAE85753CED387F46
PassNTLMv2      38693ACD4F75CAC6FC8185324BF450B3    # Only for user 'username', domain 'example.com'
Next we need to amend cntlm configuration file (use find command to locate this file on your system if path is different)
find / -name cntlm.conf -type f
/usr/local/etc/cntlm.conf
Create backup of file first.
cp /usr/local/etc/cntlm.conf /usr/local/etc/cntlm.conf.DEFAULT
And amend config file to look as following:
# Cntlm proxy configuration
Username        username
Domain          example.com
PassLM          2357C2F00A5CAC77ACFF9FD541DE786K
PassNT          Z375790BDE3300DEAE85753CED387F46
PassNTLMv2      38693ACD4F75CAC6FC8185324BF450B3   # Only for user 'username', domain 'example.com'
Proxy           corporate-proxy:80
NoProxy         localhost, 127.0.0.*, 10.*, 192.168.*
Listen          3128
Gateway         no
Now enable and start cntlm service.
brew tap homebrew/services
brew services start cntlm
lsof -nP +c 15 | grep LISTEN | grep -i cntlm
You should see something like this:
cntlm 14385 username 3u IPv4 0xa743d1ffedb24d33 0t0 TCP 127.0.0.1:3128 (LISTEN)
Now time to test proxy. In order to test proxy we need to pass proxy parameters to our shell and we can use curl to test access to outside world:
export htt{p,ps}_proxy=http://127.0.0.1:3128
env | grep proxy
http_proxy=http://127.0.0.1:3128
https_proxy=http://127.0.0.1:3128
curl checkip.amazonaws.com
Ok now once we have access via our cntlm proxy to outside world, we can setup minikube. Execute following command to setup your minikube cluster.
minikube start --vm-driver=virtualbox --kubernetes-version v1.13.2 --docker-env http_proxy=http://corporate-proxy.com:80 --docker-env https_proxy=http://corporate-proxy.com:80 --docker-env no_proxy=corporate-proxy.com,$(minikube ip)
If all well, you should be able to see following:
Starting local Kubernetes v1.13.2 cluster...
Starting VM...
Getting VM IP address...
Moving files into cluster...
Setting up certs...
Connecting to cluster...
Setting up kubeconfig...
Stopping extra container runtimes...
Starting cluster components...
Verifying kubelet health ...
Verifying apiserver health ...
Kubectl is now configured to use the cluster.
Loading cached images from config file.


Everything looks great. Please enjoy minikube!
Now check cluster status with following commands:
minikube ip && kubectl get cs && kubectl get all --all-namespaces
Expected output should be similar to following:
192.168.99.116
NAME                 STATUS    MESSAGE              ERROR
scheduler            Healthy   ok
controller-manager   Healthy   ok
etcd-0               Healthy   {"health": "true"}
NAMESPACE     NAME                                   READY   STATUS    RESTARTS   AGE
kube-system   pod/coredns-86c58d9df4-ftbnq           1/1     Running   0          4m6s
kube-system   pod/coredns-86c58d9df4-q5mjn           1/1     Running   0          4m6s
kube-system   pod/etcd-minikube                      1/1     Running   0          3m17s
kube-system   pod/kube-addon-manager-minikube        1/1     Running   0          3m
kube-system   pod/kube-apiserver-minikube            1/1     Running   0          3m27s
kube-system   pod/kube-controller-manager-minikube   1/1     Running   0          3m2s
kube-system   pod/kube-proxy-qzdtw                   1/1     Running   0          4m6s
kube-system   pod/kube-scheduler-minikube            1/1     Running   0          3m
kube-system   pod/storage-provisioner                1/1     Running   0          4m4s

NAMESPACE     NAME                 TYPE        CLUSTER-IP   EXTERNAL-IP   PORT(S)         AGE
default       service/kubernetes   ClusterIP   10.96.0.1    <none>        443/TCP         4m16s
kube-system   service/kube-dns     ClusterIP   10.96.0.10   <none>        53/UDP,53/TCP   4m12s

NAMESPACE     NAME                        DESIRED   CURRENT   READY   UP-TO-DATE   AVAILABLE   NODE SELECTOR   AGE
kube-system   daemonset.apps/kube-proxy   1         1         1       1            1           <none>          4m12s

NAMESPACE     NAME                      READY   UP-TO-DATE   AVAILABLE   AGE
kube-system   deployment.apps/coredns   2/2     2            2           4m12s

NAMESPACE     NAME                                 DESIRED   CURRENT   READY   AGE
kube-system   replicaset.apps/coredns-86c58d9df4   2         2         2       4m6s
Congratulations - you got Minikube single-node cluster running on your machine! Now you can activate additional addons and try deploying Applications stacks.
Let’s activate ingress addon:
minikube addons enable ingress
Next we can try create sample App stack YAML file and try to deploy it on our K8s Minikube cluster. In following file we will create service, deployment and ingress. We also will try target application once it is fully deployed with curl command to get output back on shell.
Our YAML file will look like this (this should simple deploy web service):
---

# First app will respond to us "DAY"

kind: Pod
apiVersion: v1
metadata:
  name: day-app
  labels:
    app: day
spec:
  containers:
    - name: day-app
      image: hashicorp/http-echo
      args:
        - "-text=DAY"

---

kind: Service
apiVersion: v1
metadata:
  name: day-service
spec:
  selector:
    app: day
  ports:
    - port: 5678 # Default port for image

---

# Second app will respond to us "NIGHT"

kind: Pod
apiVersion: v1
metadata:
  name: night-app
  labels:
    app: night
spec:
  containers:
    - name: night-app
      image: hashicorp/http-echo
      args:
        - "-text=NIGHT"

---

kind: Service
apiVersion: v1
metadata:
  name: night-service
spec:
  selector:
    app: night
  ports:
    - port: 5678 # Default port for image

---

# Next we will add INGRESS to expose both APPs
#
# curl request -> ingress (split traffic) -> APP=DAY,APP=NIGHT services -> Landing on POD and giving response related to POD behaviour (so DAY or NIGHT)

apiVersion: extensions/v1beta1
kind: Ingress
metadata:
  name: dayandnight-ingress
  annotations:
    ingress.kubernetes.io/rewrite-target: /
spec:
  rules:
  - http:
      paths:
        - path: /day
          backend:
            serviceName: day-service
            servicePort: 5678
        - path: /night
          backend:
            serviceName: night-service
            servicePort: 5678
Now we can apply/deploy this and test deployment:
kubectl create -f sample_stack_with_ingress.yaml
We should see following, while executing command: “kubectl get pods,services,ingress”
NAME            READY   STATUS    RESTARTS   AGE
pod/day-app     1/1     Running   0          8m29s
pod/night-app   1/1     Running   0          8m29s

NAME                    TYPE        CLUSTER-IP      EXTERNAL-IP   PORT(S)    AGE
service/day-service     ClusterIP   10.110.70.193   <none>        5678/TCP   8m29s
service/kubernetes      ClusterIP   10.96.0.1       <none>        443/TCP    35m
service/night-service   ClusterIP   10.104.166.44   <none>        5678/TCP   8m29s

NAME                                     HOSTS   ADDRESS     PORTS   AGE
ingress.extensions/dayandnight-ingress   *       10.0.2.15   80      8m30s
Now our application stack on Minikube K8s cluster can be easily tested with help of curl:
curl -kL http://$(minikube ip)/{day,night}
Expected output:
DAY
NIGHT
Ok what next? Well next we can activate Web UI interface for K8s - yes I am referring here to K8s dashboard. Following few commands will deploy and expose Kubernetes dashboard on your browser:
minikube addons enable dashboard && kubectl get pods --all-namespaces | grep dashboard && sleep 15 && minikube dashboard
Command output and expected behavior should be similar to output below:
dashboard was successfully enabled
kube-system   kubernetes-dashboard-ccc79bfc9-blzbm       1/1     Running   0          5m18s
Enabling dashboard ...
Verifying dashboard health ...
Launching proxy ...
Verifying proxy health ...
Opening http://127.0.0.1:56152/api/v1/namespaces/kube-system/services/http:kubernetes-dashboard:/proxy/ in your default browser...
And in your browser, you should see nice K8s dashboard UI:
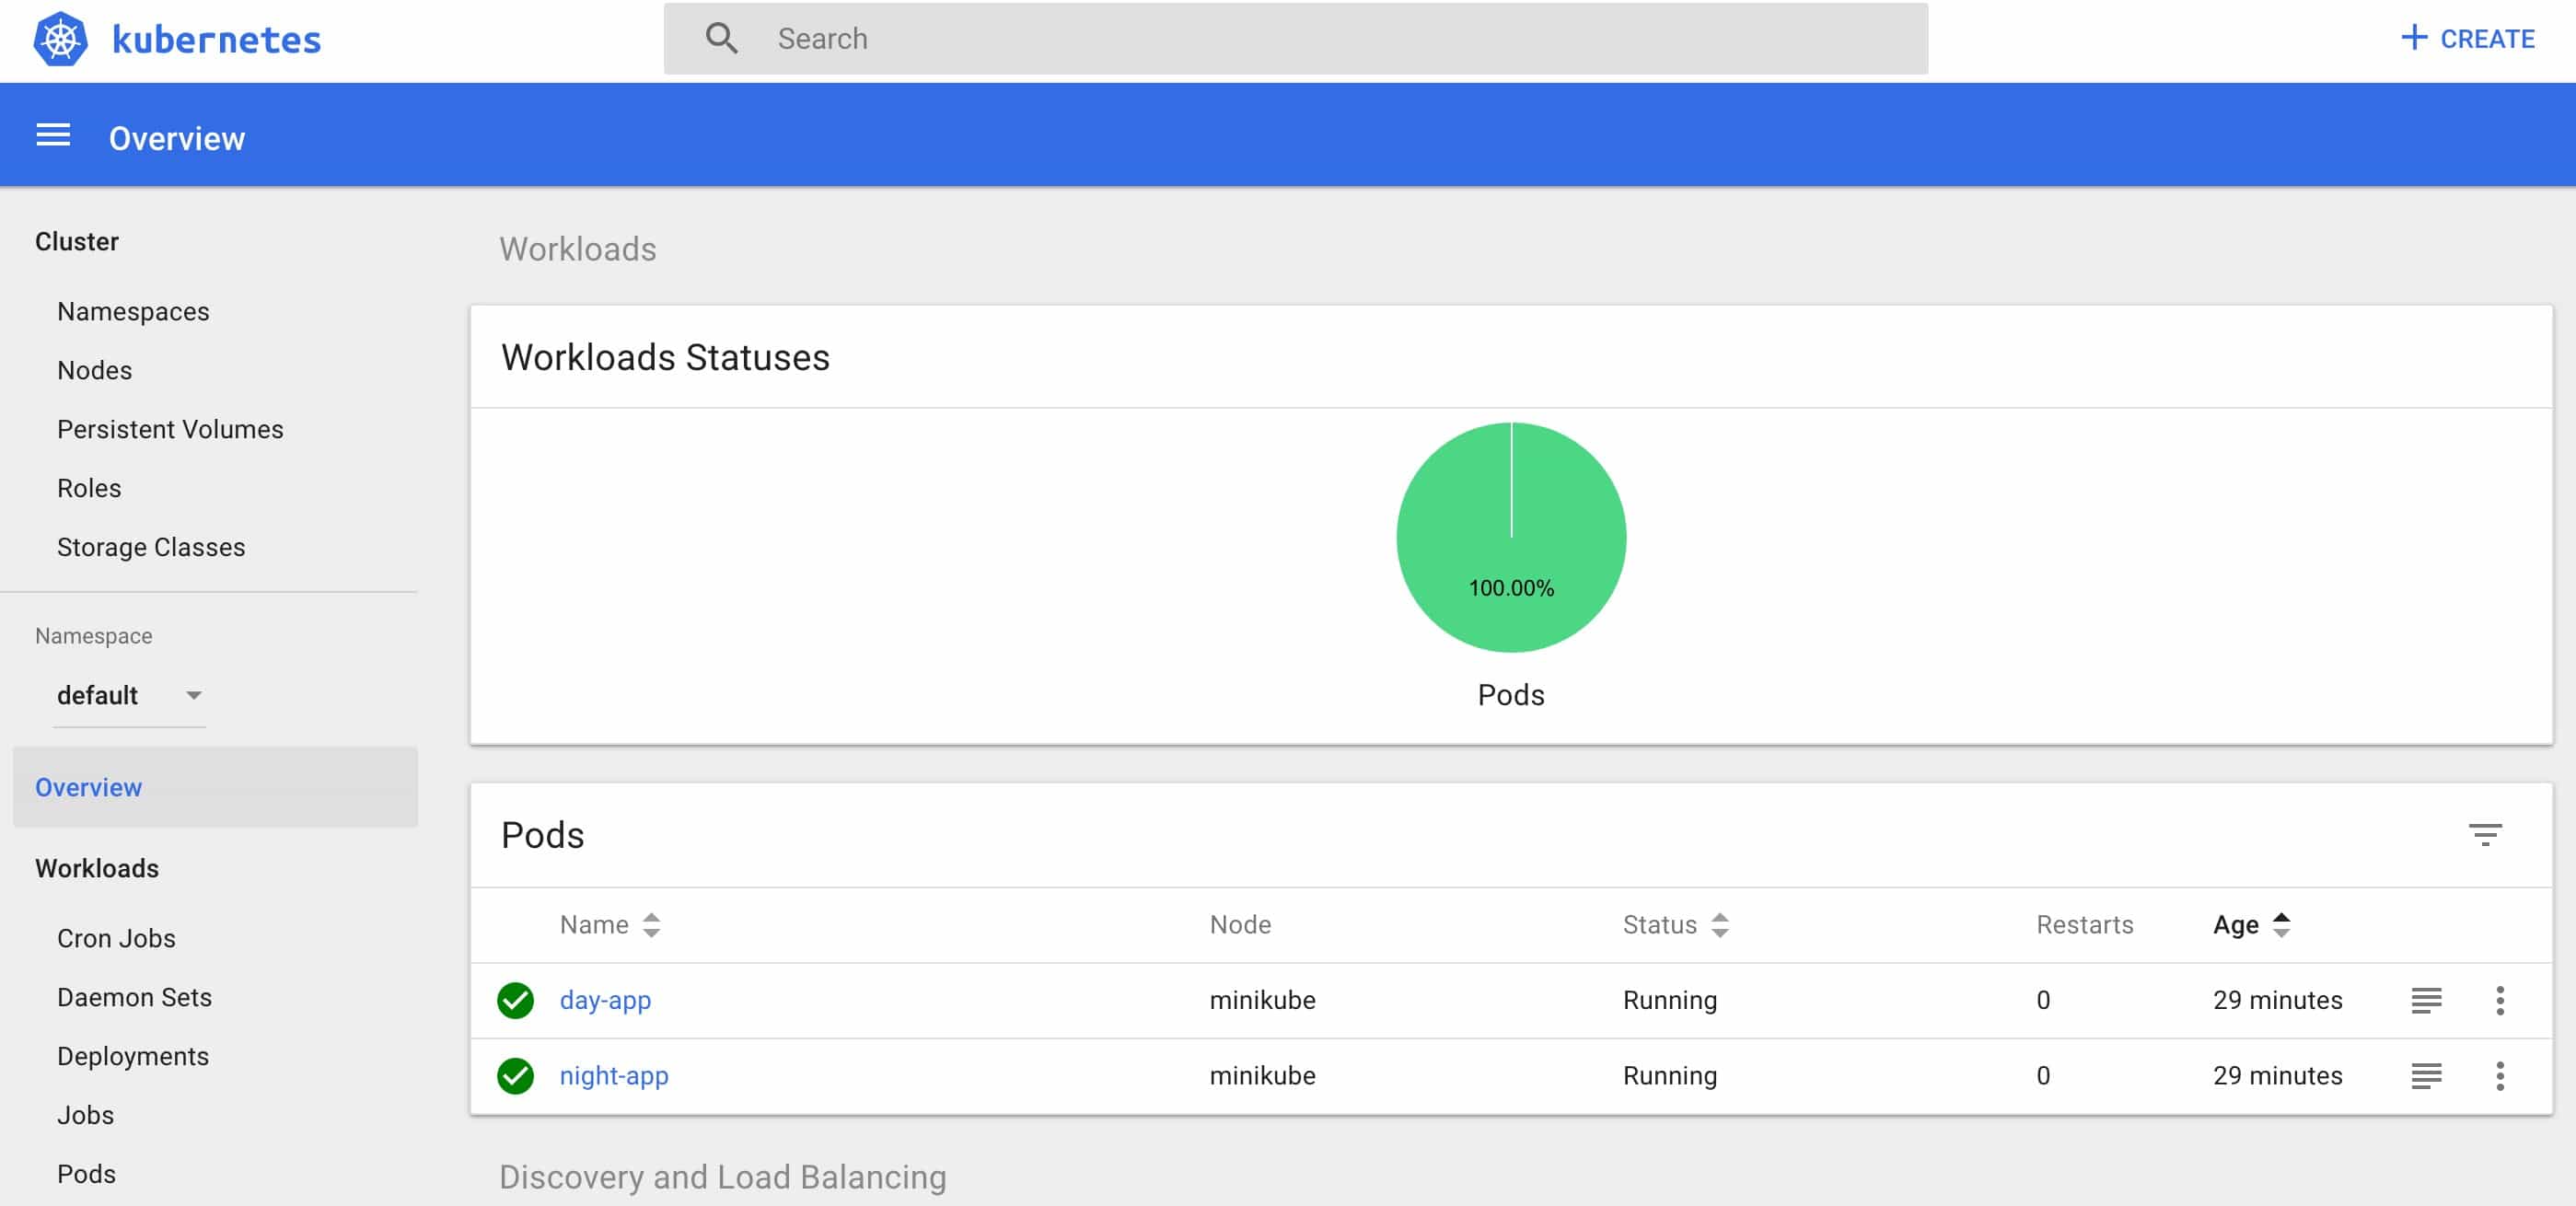
Thanks for reading! I hope this was useful!